
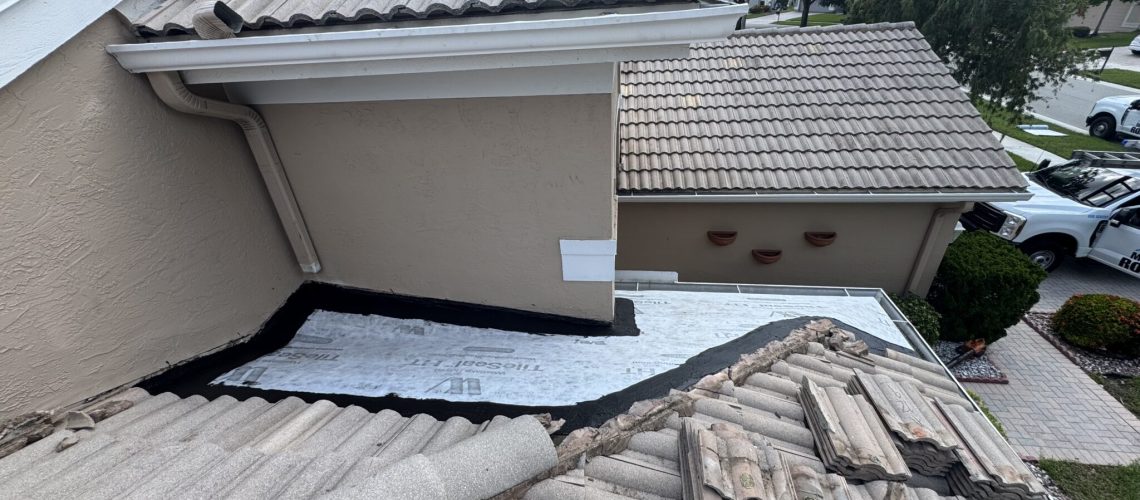
By the time a hurricane is in the forecast, the most valuable thing a commercial roof can have is a recent, documented baseline of its condition. For property managers, facility directors, and condominium and HOA boards across Palm Beach County and South Florida, the difference between a manageable post-storm claim and a drawn-out dispute usually comes down to what was documented before the wind and water arrived. This checklist walks through what to inspect, what to photograph, and when — from the pre-season baseline through the 72 hours before landfall to the safe post-storm walk.
It is written for the people responsible for real buildings: retail centers, medical and office buildings, warehouses, and multi-building portfolios. It is not legal or insurance advice, and every roof is different. When work is warranted, Mike McGilvary Roofing (Florida Certified Roofing Contractor CCC1331721) documents condition first and recommends targeted repairs over premature replacement wherever the roof supports it.
1. Why a documented pre-storm roof baseline matters
A commercial roof rarely fails in a storm at a spot that was in perfect condition the week before. It fails where a seam was already lifting, a drain was already slow, or a prior repair had already started to let go. A documented baseline — dated photographs and notes of the roof’s actual condition — does two things. First, it lets you fix the known weak points before they become the storm’s entry points. Second, if damage does occur, it gives your carrier and adjuster a clear before-and-after that separates genuine storm damage from long-standing wear. FEMA and Ready.gov both emphasize documenting property condition ahead of a disaster for exactly this reason. On a commercial building, that documentation is most useful when it is specific: which corner, which curb, which drain.
2. Roof-field and membrane condition
Start with the broad field of the roof — the membrane or system across the open areas. On low-slope commercial roofs (TPO, EPDM, modified bitumen, built-up), look for:
- Blisters, ridging, or bubbling that indicate trapped moisture or a delaminating layer.
- Punctures, tears, or foot-traffic damage, especially in walk paths and near rooftop equipment.
- Open or fishmouthed seams where the membrane laps.
- Granule loss on modified-bitumen or built-up systems, which exposes the layers beneath to UV and wind.
- Soft or spongy areas underfoot, which often signal saturated insulation below.
Photograph the field conditions and note their location. A membrane that is intact and well-adhered is far less likely to peel or balloon under hurricane-force uplift.
3. Seams, flashings and prior repair areas
Wind and water find the joints first. Inspect every seam, every flashing, and — critically — every place a previous repair was made:
- Base flashings where the roof meets walls, curbs, and parapets.
- Counter-flashings and termination bars; look for loose fasteners and separation.
- Old patches and prior repairs, which are the most common failure points we see. A patch that held in calm weather can be the first thing to lift in a storm.
This is the heart of a repair-versus-replacement decision: many seam and flashing issues are correctable now, well before they force a larger conversation.
4. Drains, scuppers, gutters and ponding-water areas
Hurricanes bring rain volume that finds every drainage weakness. On a commercial roof, clogged or undersized drainage is one of the most preventable causes of interior water damage. Check and clear:
- Roof drains and strainers — remove debris and confirm they flow freely.
- Scuppers and overflow scuppers — the secondary path that protects the roof when primary drains back up.
- Gutters and downspouts on buildings that use them.
- Ponding areas — standing water that lingers more than 48 hours after rain marks a low spot that deserves attention before the season peaks.
5. HVAC curbs, pipe penetrations and rooftop-equipment interfaces
Rooftop equipment is where the roof system meets everything else, and it is a frequent leak source. Inspect:
- HVAC curbs and the flashing where units meet the roof.
- Pipe boots and penetration seals, which crack and dry out in the Florida sun.
- Gas lines, conduit, and equipment supports (pitch pans and pipe stands) that can vibrate loose.
- Condensate lines and the areas beneath units where constant moisture degrades the membrane.
Loose or damaged equipment flashing should be corrected before a storm — and any work on the equipment itself coordinated with the appropriate mechanical contractor.
6. Parapet walls, coping, edge metal and perimeter attachment
The perimeter of a commercial roof takes the highest wind uplift, and edge-metal failure is a leading cause of progressive roof loss in hurricanes. Inspect:
- Coping caps on parapet walls — confirm they are secure and sealed at the joints.
- Edge metal and drip edge and their attachment; loose edge metal can peel a membrane back like a lid.
- Parapet wall condition — cracks, open joints, and failing sealant.
- Perimeter fastening of the membrane where the field meets the edge.
7. Loose rooftop materials and equipment coordination
Anything loose on a roof becomes a projectile in hurricane winds — and a source of impact damage to the membrane and to neighboring properties. Before a storm, walk the roof for:
- Loose pavers, walkway pads, or ballast.
- Unsecured tools, materials, or equipment left by other trades.
- Loose signage, antennas, or satellite equipment.
Where rooftop mechanical or equipment items need securing or removal, coordinate with the appropriate mechanical or equipment contractor rather than disturbing systems outside a roofer’s scope.
8. What to document 60–90 days before peak conditions
The pre-season window — roughly 60 to 90 days before peak hurricane activity — is when corrective work is easiest to schedule and least rushed. In this window:
- Complete a full condition walk and a dated photo set of the entire roof.
- Address the seam, flashing, drainage, and edge-metal items above while crews and materials are available.
- Confirm your documentation is organized by building and roof area, so it is usable if you ever need to file.
- For roofs where age or condition is in question, a documented condition assessment puts a professional baseline on record.
9. What to check about 72 hours before a forecast storm
When a storm is in the forecast and it is still safe to be on the roof, a focused pre-storm check matters:
- Clear all drains, scuppers, and gutters of debris one more time.
- Secure or remove loose materials and rooftop items.
- Re-photograph the roof’s current condition — this timestamped set is your immediate “before.”
- Confirm interior areas beneath known weak points are protected where practical.
Never send anyone onto a roof once conditions have become unsafe. Ready.gov’s guidance is clear that personal safety comes before property tasks as a storm approaches.
10. Safe post-storm inspection and photo documentation
After the storm passes and it is safe to access the building, document before you disturb anything:
- Photograph all damage — wide shots for context and close-ups for detail — before any temporary repairs.
- Note interior water intrusion and match it to the roof area above.
- Install temporary protection (tarping, water diversion) only where it is safe, and photograph that too.
- Compare against your pre-storm baseline to show exactly what changed.
If you need emergency stabilization, 24/7 emergency roof response can protect the interior while a full assessment is arranged.
11. Distinguishing targeted corrective work from premature replacement
After a storm, a commercial building owner is often told the entire roof must be replaced. Sometimes that is true. Often it is not. The honest question is whether the damage is localized and repairable or whether the system as a whole has genuinely failed. A documented, condition-based assessment answers it — the same repair-first, preserve-what-is-sound approach Mike applies on every repair-versus-replacement decision, and the approach he outlines for boards and managers in his published Florida Community Association Journal guidance and for HOA and condominium roofing decisions.
12. Emergency response and commercial roof assessment
Mike McGilvary Roofing serves commercial and industrial properties across Palm Beach County and South Florida with pre-season documentation, corrective repairs, and 24/7 emergency response. If you manage a retail center, medical or office building, warehouse, or a multi-building portfolio and want a documented pre-storm baseline — or a straight answer after a storm about whether you need repair or replacement — start with a commercial roof assessment.
Call (561) 856-5060 for a commercial roof assessment or 24/7 emergency response. Florida Certified Roofing Contractor CCC1331721.
This checklist is general guidance for Florida commercial properties, not legal or insurance advice. Every roof and building is different; conditions, timing, and any work should be evaluated for your specific property. For authoritative preparedness guidance, see FEMA (fema.gov) and Ready.gov.